I recently had the opportunity to "get their hands" (for the umpteenth time, to tell the truth!) In washing machine at home.
Suddenly, the dear washing machine did not want to learn to spin, greatly complicating the operations of drying clothes (this time then!).
Needless to say, in a time of five minutes the machine was carefully dismantled to find the cause.
So ... If the spin does not start, or is the engine, or are the brushes, or is it .. ECU!
's think logically.
The engine seemed in good condition, no signs of burning, no funny smell, no suspicious noise, maybe just the brushes a bit 'worn, but could still do a lot of "road".
E 'Simply remove the unit from the narrow slot (some sources confirm to me that there are teams of people devoted to studying the most uncomfortable position and unreachable for these units blessed!) to realize the problem.
Diagnosis of the fault.
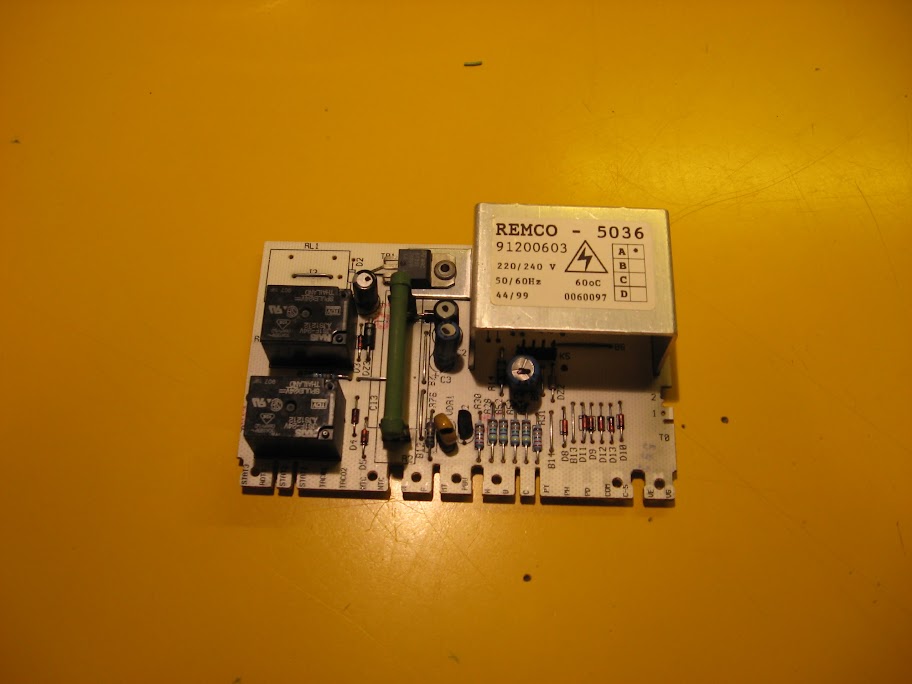
An overview of the upper side usually allows you to find components visibly burned, damaged or even explode, but it is not 'the case.
Turning the card looks pretty clear the source of the problem:
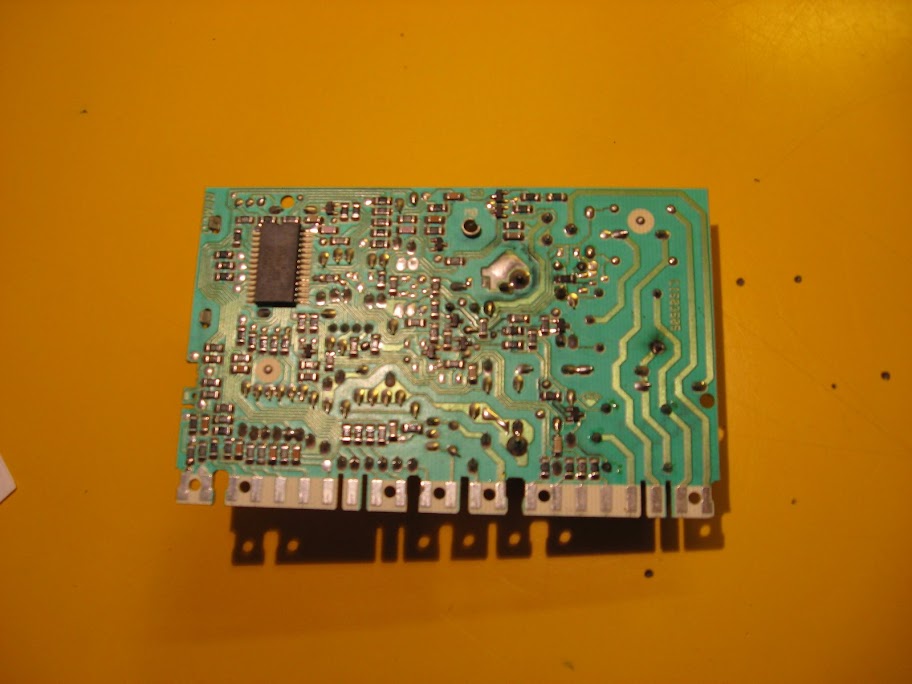
not noticed anything? Not even on the right?
closer look:
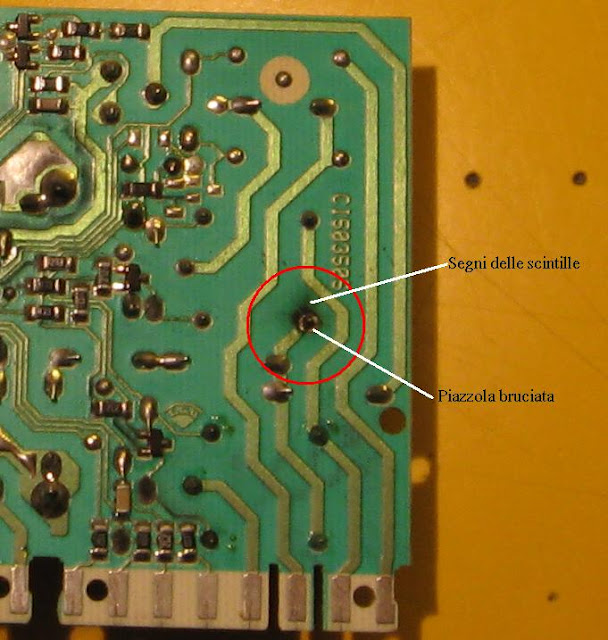
Oh yes, you as well! In correspondence with one of two relays visible in first photo, there is what remains of a weld. The pitch is gone, the pin of the relay charred, and instead of the pond there is a black flash.
The fault of this card is due in all probability 'the combination of mechanical stress, humidity and general poor quality of the printed circuit board. There is in fact saying that the other welds did not look good, and the severance of this specific welding prelude to future failures of the same type.
happens that a weld is deteriorating as a result of mechanical stress (such as vibration or temperature changes), giving rise to the same flaws, which undermine conductivity. The current (rather high in this case, since it is the relay of the centrifuge) does the rest, warming and deteriorating further welding, to lead to sparks that consume in a short time.
how to proceed.
The repair of this type of problem is obviously to restore the original welding, but necessitates a review of the entire printed circuit board, to counter the possibility that the failure is repeated (very probable, with circuits like this bad).
First you have to clean up the damaged area of \u200b\u200bdebris, burning marks and dust and to this end is fine a bit 'of sandpaper Very fine. Here come the first problems due to heat.
In this specific case, the heat has altered the protective coating of the PCB, which in fact is scraped up adjacent to the welding of the relay. The copper track and 'almost always compromise, and we need a' tin 'of the track itself, ie the deposition of a thin layer of tin, which provides better conductivity and mechanical strength.
After an initial mechanical cleaning, is necessary to act with an alcohol-based rinse and thorough drying. Particular attention must be paid in the peeling of the runway next to the weld (which will serve as support). It often happens that it remains a bit 'of welding and paint the border of the track, effectively creating a barrier to future welding 'cordon'. should operate with an awl or a knife to free any remaining copper.
Given the conditions affected the runway and the terminal of the relay, you should not skimp with the flux. Personally, I pre-tin the end of the relay and the track, the entire applicant pool that I needed, and then I acted with the flux, which has greatly helped the distribution of the pond. The pond is used
the 67/33 already presented above, I chose this pond for his skills as a greater flexibility in cold, and the best quality of the internal flux, which is essential for this repair.
After the first layer of tin, have strengthened the cordon with another pass.
is the result:
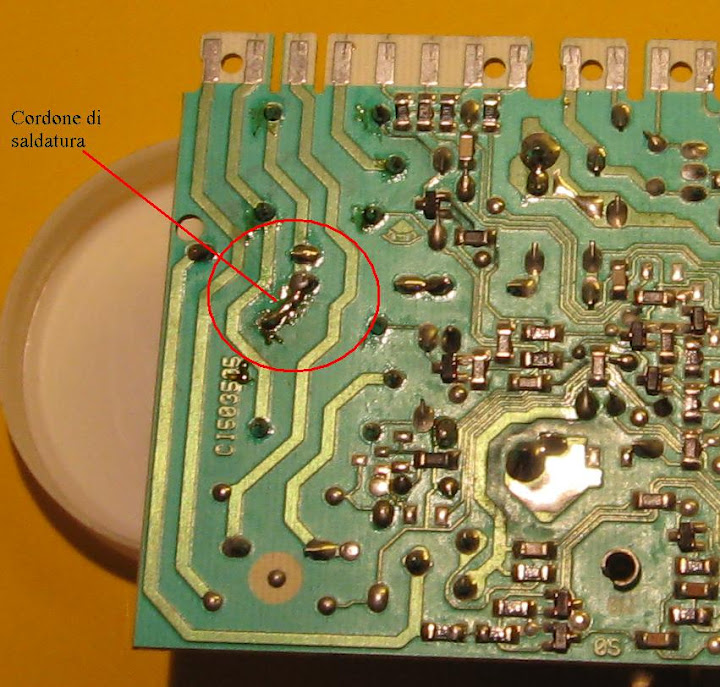
You notice the cord now connects the terminal of the relay closest to the pitch. The slope of the underlying copper is in fact only as a guide, because its strength has been hopelessly compromised by the heat.
considerations.
After fixing this welding, I refreshed many of the other, sometimes adding a little 'tin, sometimes working only with the flux and adding very small quantities of tin. We must avoid it in the strongest terms of 'weighting' stir welds mildly tin old to the new one, as the amalgam uneven and 'practically a guarantee of failure (and' a sufficient temperature change for 'cracked' inside the tubes), and the addition of tin easily causes a swelling of the weld itself, which directly affects the mechanical strength.
welds are to be reviewed especially those relating to the components Through-Hole (TH) with bent pins. Looking at the photos carefully before you notice in fact some components with bent pins on the PCB before soldering.
This usually ensures a better mechanical strength, even when the seal is made of great economy. Some
pin, as precisely those of the relay, can not be folded (they are too short and their splitting would lead to a greater section rather than a bending), and are therefore more susceptible to failure as the one being analyzed.
After cleaning the room unit (collcato down, right to protect the electronics from the steam) and re-assembling the machine, everything worked again, better than ere!
All photos are visible at full resolution on PICASA .